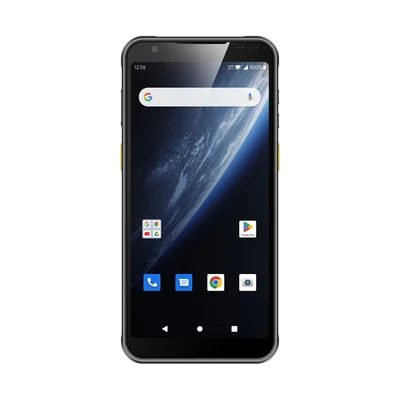
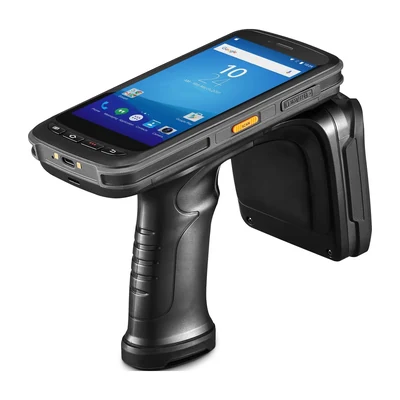
A trigger handle or holster should be evaluated as part of a repeated work cycle: retrieve the device, aim and scan, handle the item, return the device and place it for charging or the next task. An accessory can change grip, device dimensions, charging fit and the way a worker carries an item. Select the complete assembly for the named device and role, not an accessory type in isolation.
This guide is for warehouse, service and manufacturing teams comparing handheld carrying and trigger options. It explains what to observe and what product evidence to request. It does not establish that a particular accessory improves productivity or ergonomics without a representative evaluation.
Map the complete movement path before choosing an accessory
Observe where the device starts, how the worker reaches it, which hand aims it, what the other hand must do and where the device goes after the scan. Include walking, ladder or cart use, label positions, item lifting, exception entry and charging. A good accessory choice reduces a real handling conflict; it is not justified only by familiarity with a gun-shaped scanner.
Use the Rugged Handheld Terminals page to identify the device options. Then record the exact model, protective boot, battery, hand strap, trigger, holster and charging equipment under consideration. The same accessory name can describe different mechanical interfaces, so model and part identity must stay together.
Keep the decision separate from the broader form-factor choice. Mobile Computer vs Barcode Scanner compares host dependence and application location. This article begins after the handheld approach is chosen and asks how the complete carry-and-scan assembly fits the task.
Distinguish trigger, carry and storage functions
A trigger handle changes how the scanner is held and actuated. A pistol-grip configuration may be an integrated device form rather than a removable attachment. A holster or belt carrier controls where the device rests when the worker needs both hands. A cradle or charger controls the end-of-cycle placement and may impose a different fit condition.
Do not assume that one component performs all four functions. A trigger-equipped device may require a trigger-compatible holster, and the same assembly may need a different charging path. A strap can help retention without providing a rigid scan grip. A protective boot can change the fit of both a holster and a cradle.
Request the exact device, trigger handle and holster combination, including part numbers and document revision. Test insertion, retention and removal with the complete assembly. A holster for a bare handheld may not fit the same device with a handle.
Walk through one editorial picking cycle
Consider an editorial picker who alternates between scanning shelf labels and lifting cartons onto a cart. The device begins in a belt holster. The worker removes it, scans, confirms a quantity on screen, returns it to the holster and then lifts the carton with both hands. At the end of the route, the device is placed in a charging position.
Compare two complete assemblies. In the first, a removable trigger handle remains attached throughout the route and the holster is documented to accept it. In the second, the device uses its normal handheld controls and a slimmer carrier. Observe retrieval, aiming, screen confirmation, one- and two-hand transitions, return to the carrier and charging placement. Record any point where the worker removes an accessory or places the device on an unapproved surface.
This is a suggested evaluation, not a customer result. Test the intended device, specified parts, workwear and load. Choosing a Barcode Handheld for Gloved Work covers quantity correction and confirmation with gloves; it does not establish the fit or comfort of a trigger assembly.
Use a comparison record for the complete assembly
| Work step | What to observe with the named assembly | Evidence needed before approval |
|---|---|---|
| Retrieve and secure | Reach option, retention, accidental control contact and whether the full assembly enters and leaves the carrier cleanly | Exact device and accessory part numbers; supplier fit statement; representative user observation |
| Aim, trigger and confirm | Wrist and device position, trigger access, aiming feedback and ability to read the confirmation screen | Specified scan configuration; label positions; task sequence; observed result under stated conditions |
| Handle the item | Where the device rests while both hands move or inspect the item | Carrier or placement method; retention limits; safety review for the actual work area |
| Return and move | Whether the user can replace the device without unplanned disassembly or cable interference | Installed accessory drawing or photos; workwear and movement check |
| Charge or hand over | Whether the specified assembly fits the charging and storage arrangement, or which authorised removal step is required | Charger/cradle compatibility document; power components; documented end-of-cycle procedure |
The table keeps supplier facts and workplace observations separate. A part list can establish the intended combination; it cannot prove that every user, garment, cart or task will handle it comfortably. An observed preference can guide a pilot; it cannot establish model compatibility.
Verify exact parts and dependencies in vendor documentation
Keep accessory compatibility tied to the named device configuration and part number. “Pistol-grip handheld” describes a form factor, not a fit guarantee. Preserve the supplier’s exact compatibility statement in the purchase record.
Document charging for the assembled device and any spare battery separately from USB or Ethernet functions. Include cradle, supply and accessory part numbers. Test the power path with the proposed handle and protective equipment fitted.
Ask whether a boot, extended battery, hand strap or trigger changes holster or cradle compatibility. Request an installation or accessory guide for the exact assembly. If the supplier provides only a family page, identify which claims apply to the proposed part number and which remain open.
Bring the movement path and part list to the purchase discussion
Provide the model and region, application workflow, label positions, workwear, left- or right-hand constraints, carry location, item-handling steps, charging method and any existing accessory part numbers. Include photos or a simple annotated route where permitted, but do not treat a drawing as proof of fit.
Ask AIDC GO which trigger, handle, strap, holster and charging options are documented for the proposed model and country. Exact availability and compatibility require the applicable product materials. Use Integration & Support when the trigger action, key mapping or application response also needs a version-specific answer; the presence of a physical trigger does not prove how an application receives its input.
Record the specified assembly as one configuration, including parts that must be removed or exchanged before charging. Then contact AIDC GO with the device options, task, quantity, deployment country and open accessory questions. A useful purchase decision closes the full movement path without turning another manufacturer's accessory list or a short handling trial into a universal compatibility promise.
Devices for this workflow